


Short Intro To Macro Photography | Derek Hope
Finding something to do when you’re presented with some free time can be a little overwhelming. Currently, due to some less than ideal circumstances, many of us have been endowed with more free time than we know what to do with, and learning a new skill or honing an old one can be a good way of brushing away the mental cobwebs and a means to stave away the boredom. Which brings me to my point...
Macro photography can be incredibly useful in practicing some photographic fundamentals, as well as creating some unique and beautiful images. Usually, my subjects of choice would be insects and arachnids and if you’ve got a garden then it is no doubt bustling with interesting bugs to photograph. If you’ve not got a garden however then there are plenty of things you can try within the comfort of the great indoors.
Firstly, lets run through the basic essentials, as well as some extras that can really elevate your work.
The Gear
As with any photographic endeavour a camera body is a suitable starting point. It really doesn’t matter what you go for, but you’ll want something with full manual controls, other than that any CSC or DSLR will do.
When it comes to lenses, there are a few ways to go around Macro photography. Reversal macro, or Bacro as no one calls it, essentially uses an adapter that screws onto the front of your existing lens and allows you to mount it to your camera in reverse. This is a really inexpensive method but it can be a little limiting as you can only focus by moving the camera back and forth to bring your subject into focus and your depth of field is incredibly shallow.
Extension tubes are another means of converting your existing lenses for use in close up work. They move your lens further away from the image plane, decreasing your minimum focusing distance. If you get one with contacts, it will allow you full control over aperture and autofocusing, but your depth of field is still going to be much shallower than with our third option.
A dedicated Macro lens is my personal recommendation for the best results. They will give you 1:1 magnification, projecting your subject onto your sensor at life-size, a generally sharper image and you don’t need to spend extortionate amounts to get something worth using. My first macro lens was the Tamron 90mm f/2.8, which you can pick up second hand for between £120 to £150.
Next, it’s a good idea to grab yourself a flash or some kind of external light source. The Sigma EM-140 DG is an excellent ring flash that gives you tonnes of control while being simple to use. If you’re looking cheaper, then an external flash and a lens mounted diffuser will do the job.
Lastly, a tripod is a useful companion to the macro photographer. Although not absolutely essential, it can give you some flexibility in your shutter speeds and give you a steady basis to set up your composition.
Now That the Boring Bit is Out of the Way...
Now that you’ve been filled in on the excruciating details, you’re probably in a position to get out in the garden and find some lovely little models to bring your vision to life.
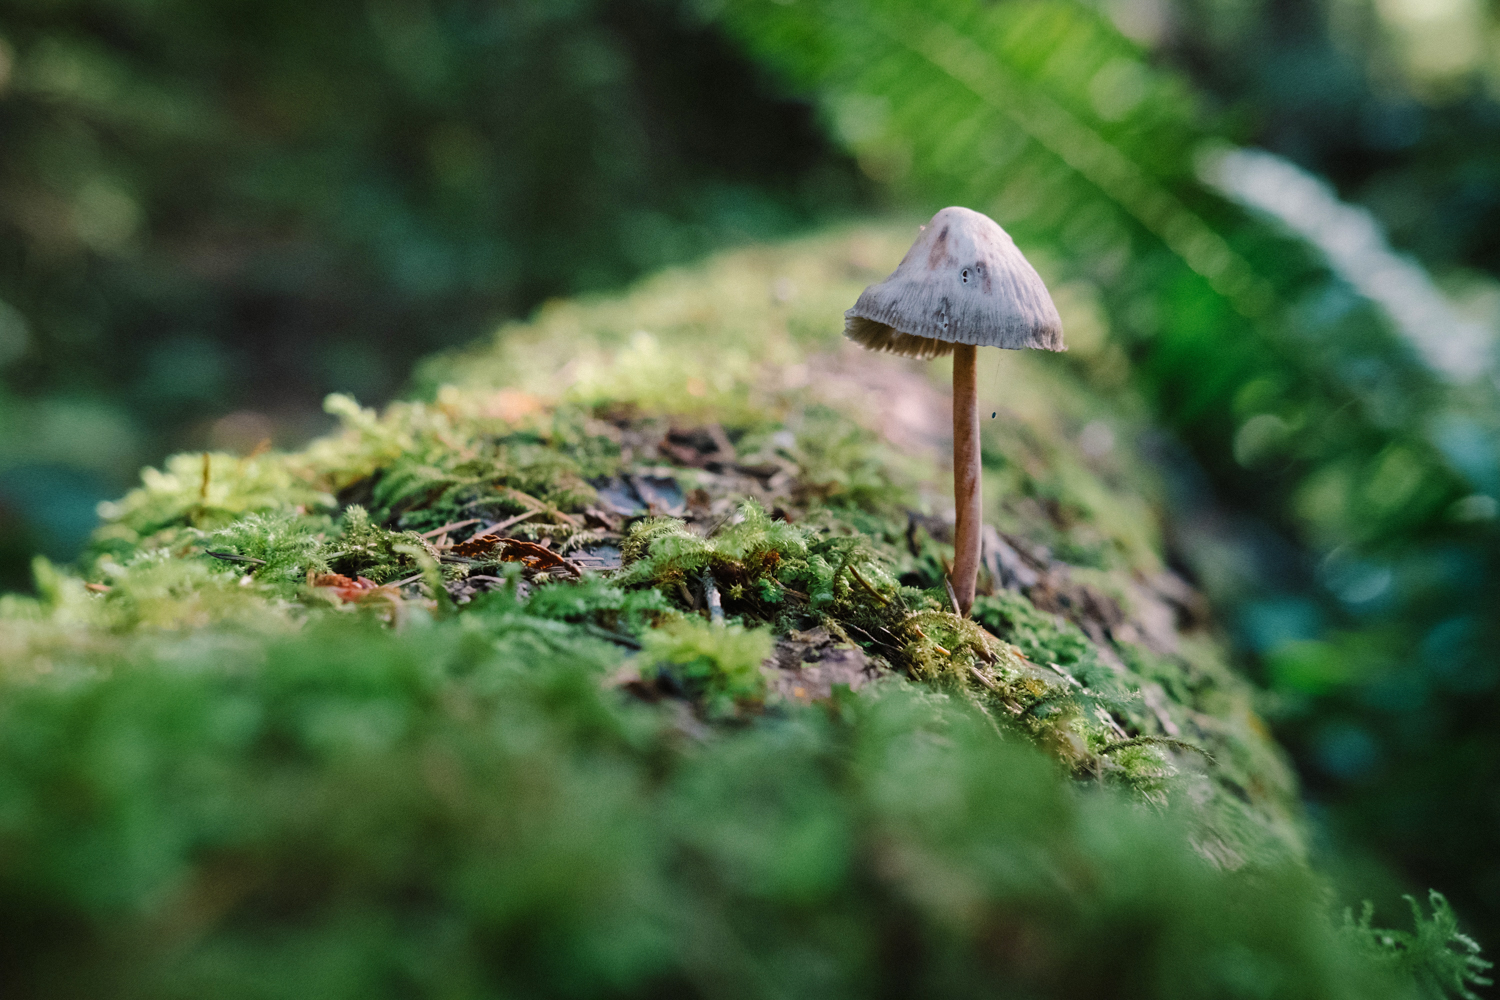
Depth of field seems to crop up a lot in macro photography and nowhere is it more important than out in the field. The rule is pretty straight forward; the closer you focus the shallower your depth of field becomes, which means that less of your image will be in focus. If you stop down the lens aperture to a larger f/ number, then this nuisance can be corrected for and can save your beautiful image from becoming a blurry blob of bokeh. I find that for most outdoor scenes, somewhere between f/8 and f/16 does the trick.
Just a small slither of this image is in focus due to the use of an aperture to wide for the subject.
If you thought you were out of the woods yet, then you’re sadly mistaken though. By stopping down your aperture you’re letting in less light which means this tack sharp image you worked so hard to achieve is plunged into darkness, rendering it useless.
This is where your flash and tripod come in. You can either pop your camera on a tripod meaning that your shutter speeds can be longer brightening your exposure and avoiding any motion blur, or you can hook up a flash and illuminate your scene. A combination of all these methods is going to ensure that your image is well exposed, and we can see that beautiful butterfly in all its glory!
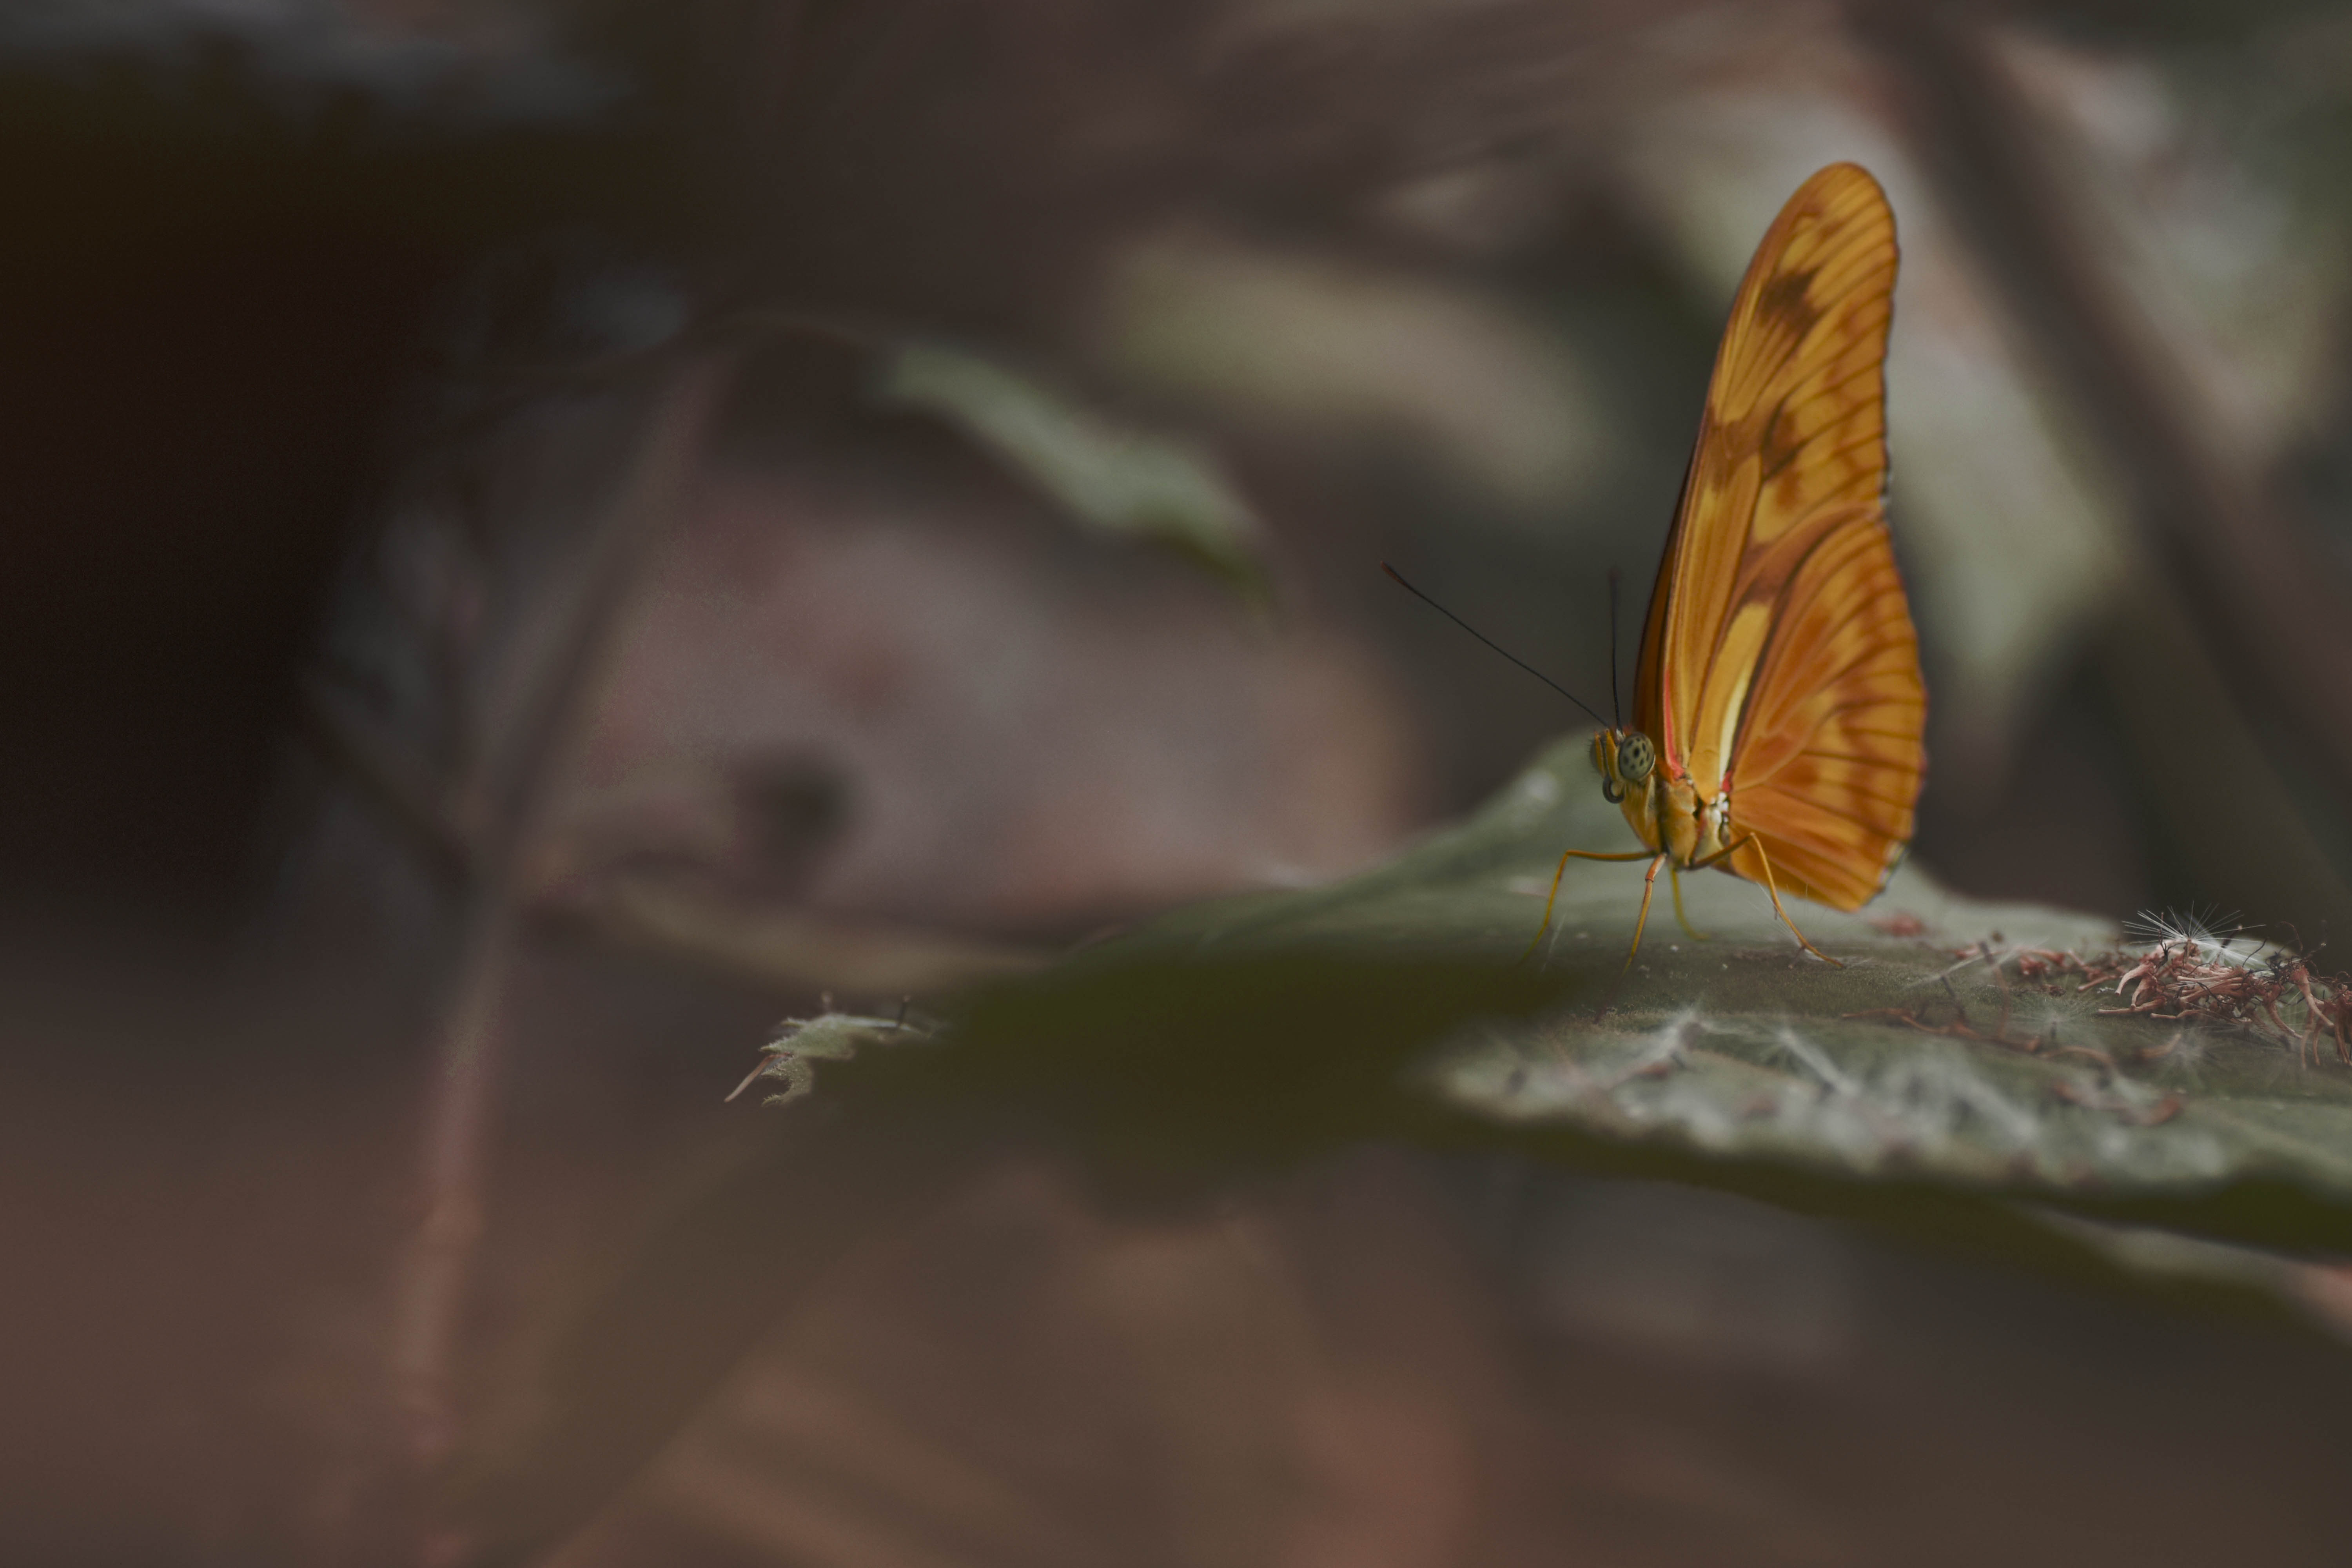
Dryas Julia Butterfly at Wye Valley Butterfly Zoo.
To Summerise.....
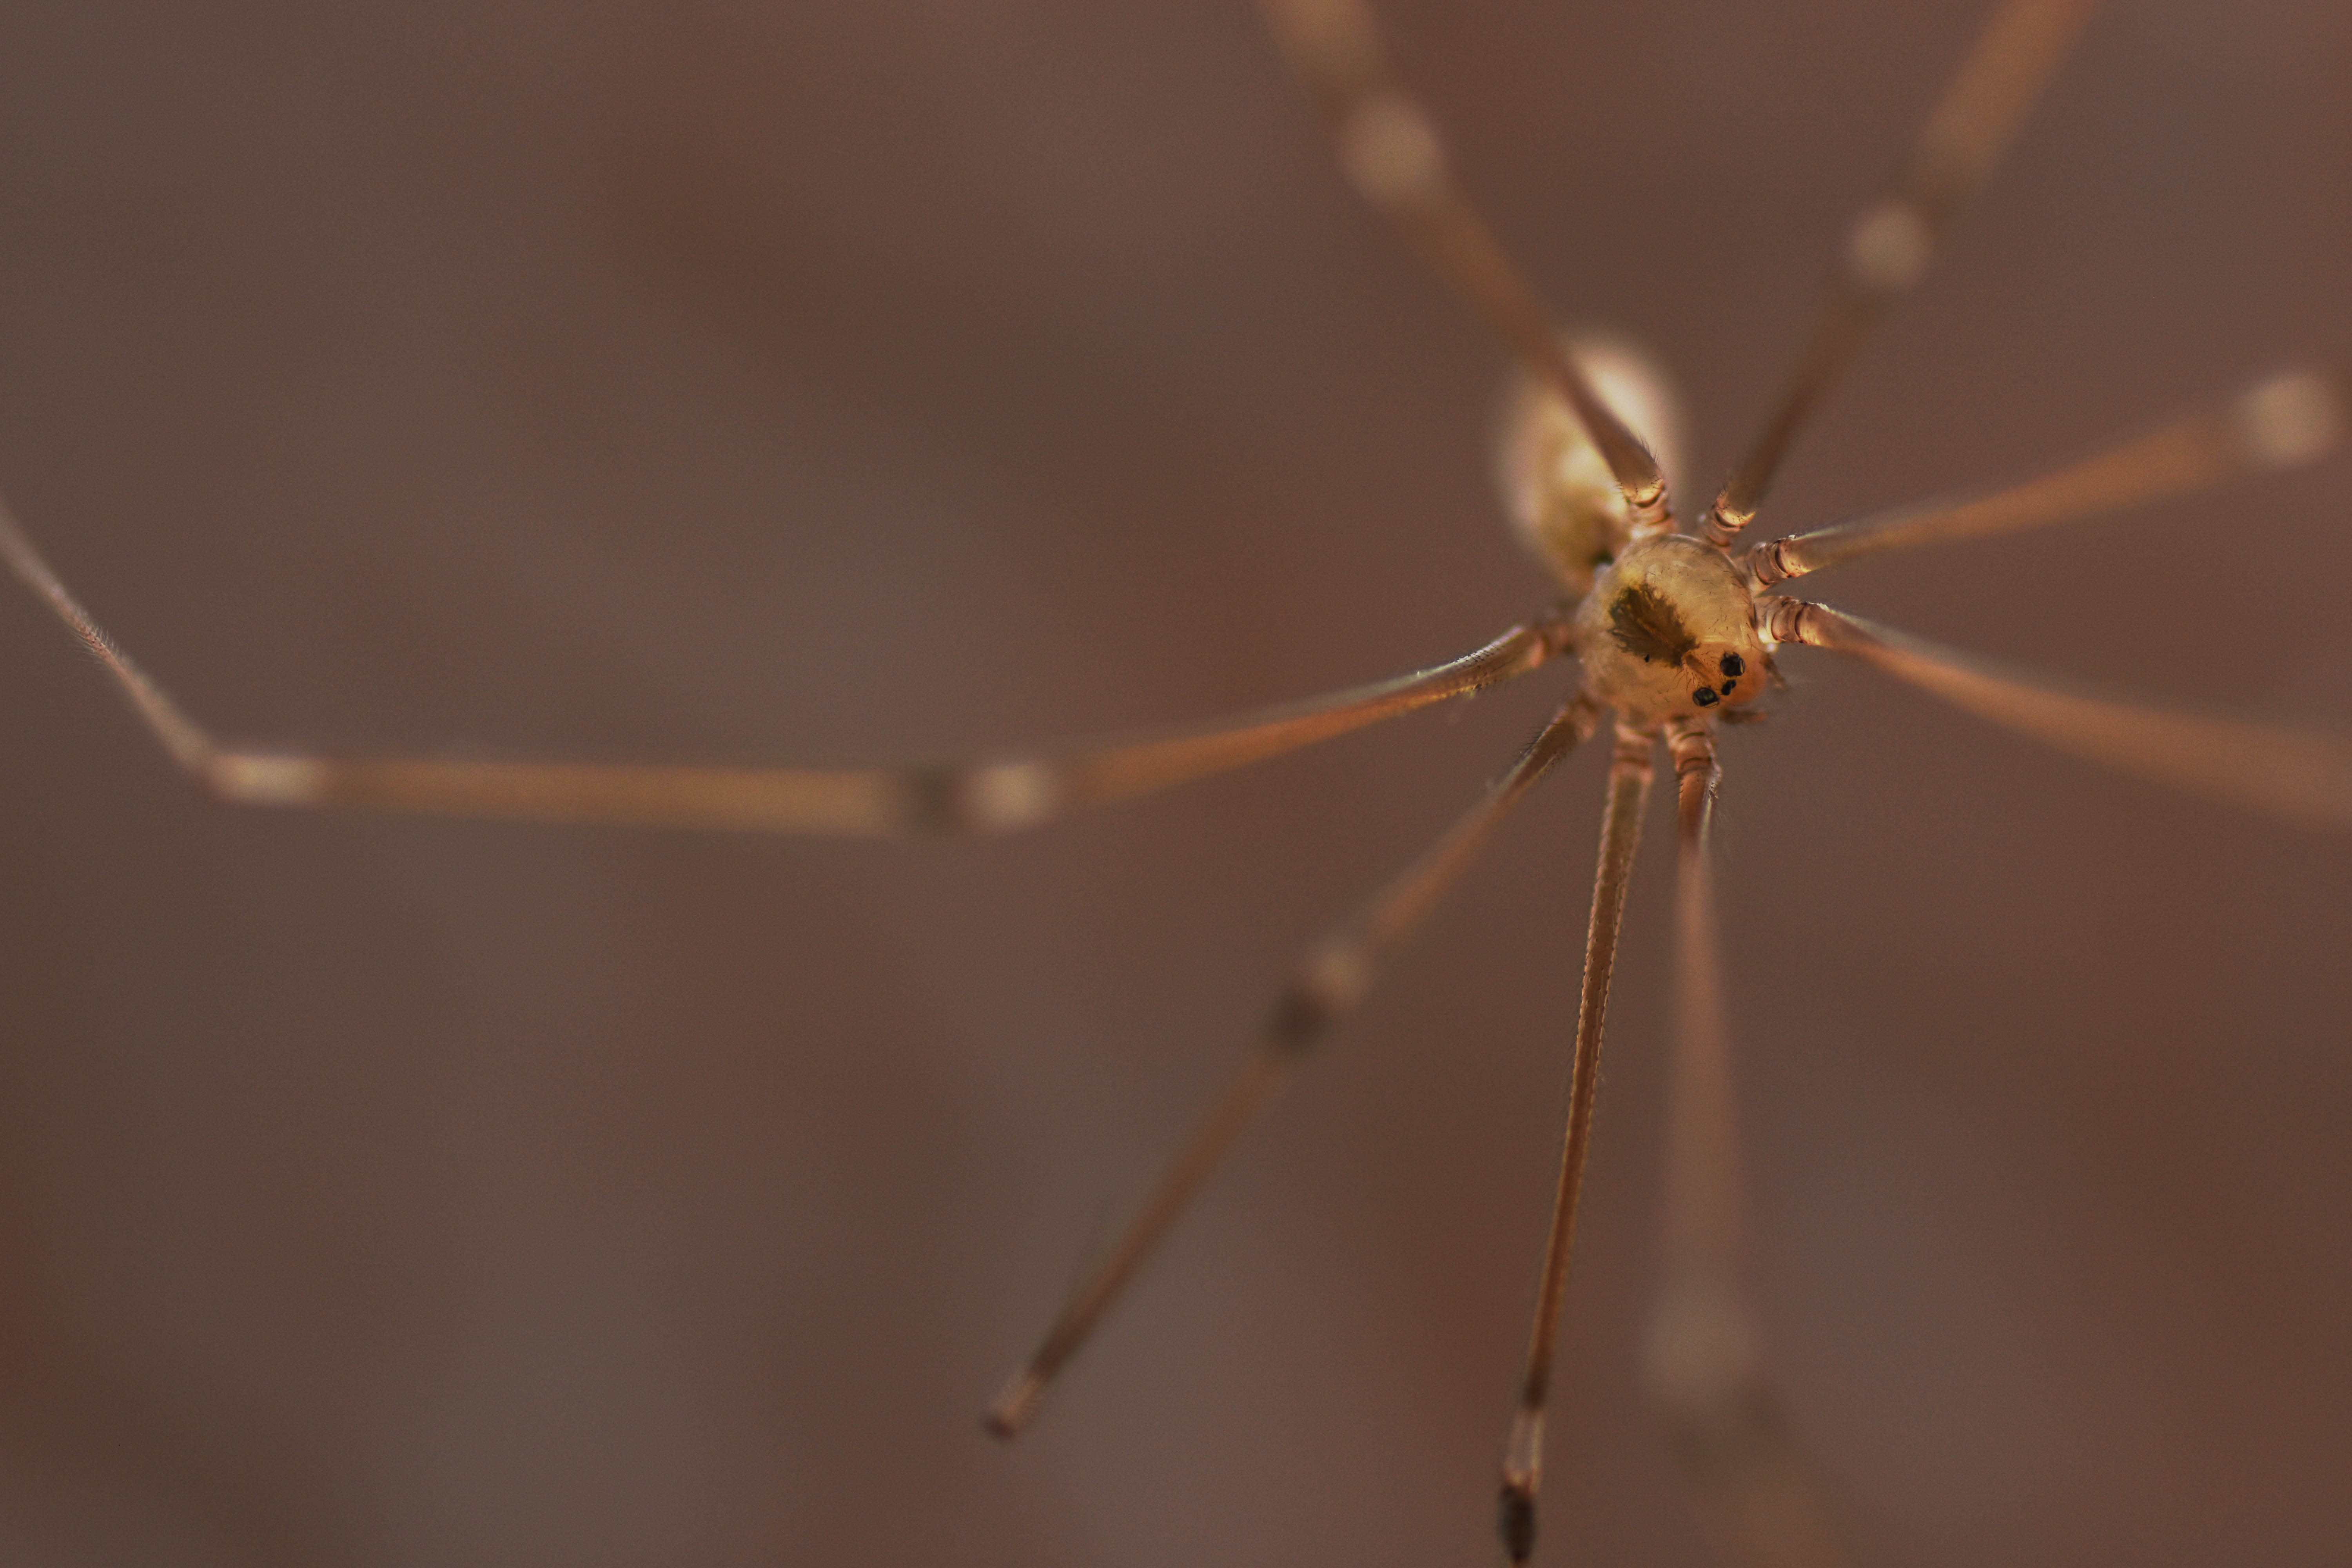
Macro can be a technical challenge, but it is one of the most rewarding forms of photography out there. It’s a good idea to brush up on the basics first as they give you the basis for everything macro related. It allows you to combine your photographic knowledge and get a practical idea of how all your settings affect one another and in doing this you can produce some truly stunning work. You don’t really even need to go outside to get some amazing results, I found this cellar spider in my bedroom and managed to snap this shot right from my desk chair. Coins, screws, pens common tiny household objects are all good practice subjects before tackling the scuttling, buzzing residents of your garden.
If you’d like to see some of my macro work plus a host of other photography related stuff, then pop over to Spectacle_Imagery on Instagram.
Stay safe out there, and get Macroing!


About Us
Complaints Procedure
Delivery Info
Employee-owned company
Modern Slavery Statement
Official Orders
Privacy Statement
Security
Support and Returns
Terms and conditions
Vulnerable Consumer Policy
WEEE Policy
Finance
Landing Pages
Banner Promotions
Interest Free Promotions
Cash Back Promotions
Black Friday Deals
LCE Newsletter
We Buy Cameras
New Equipment
Secondhand
All New Equipment
All Secondhand
All New Trade In
All New Categories
